Hello Everyone....

Paulina, the owner of Pretty Pink Posh has finally opened her new store site and ready to go.
For the debut of the new store she is having a promo that expired Feb. 5.
Don't forget to take advantage of it....she have new pretty cool colors sequins and other new fab products she added too. You can check it all at

Because of this the team has created special project(s) just for the new store site.
Here's what I came up.....to inspire you :)
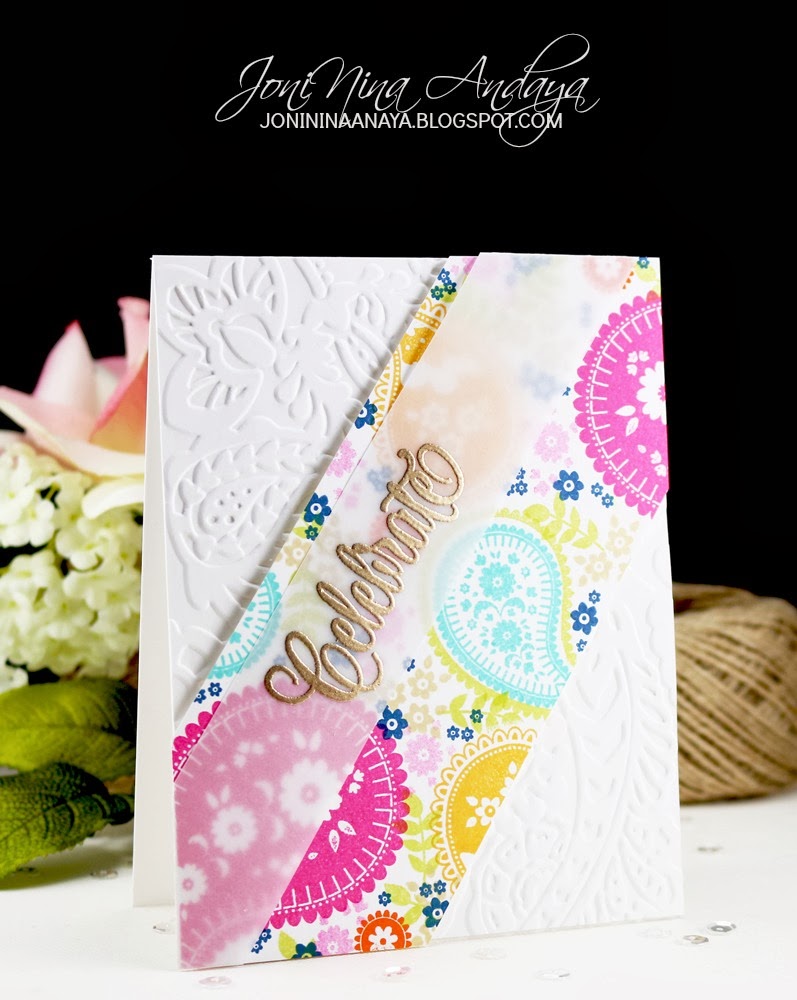
For my first card I use the Wplus9 Paisley Patterns again....really enjoying this stamp set.
Oh...also entering this at
Wplus9 Monday Mood Board #26 too.
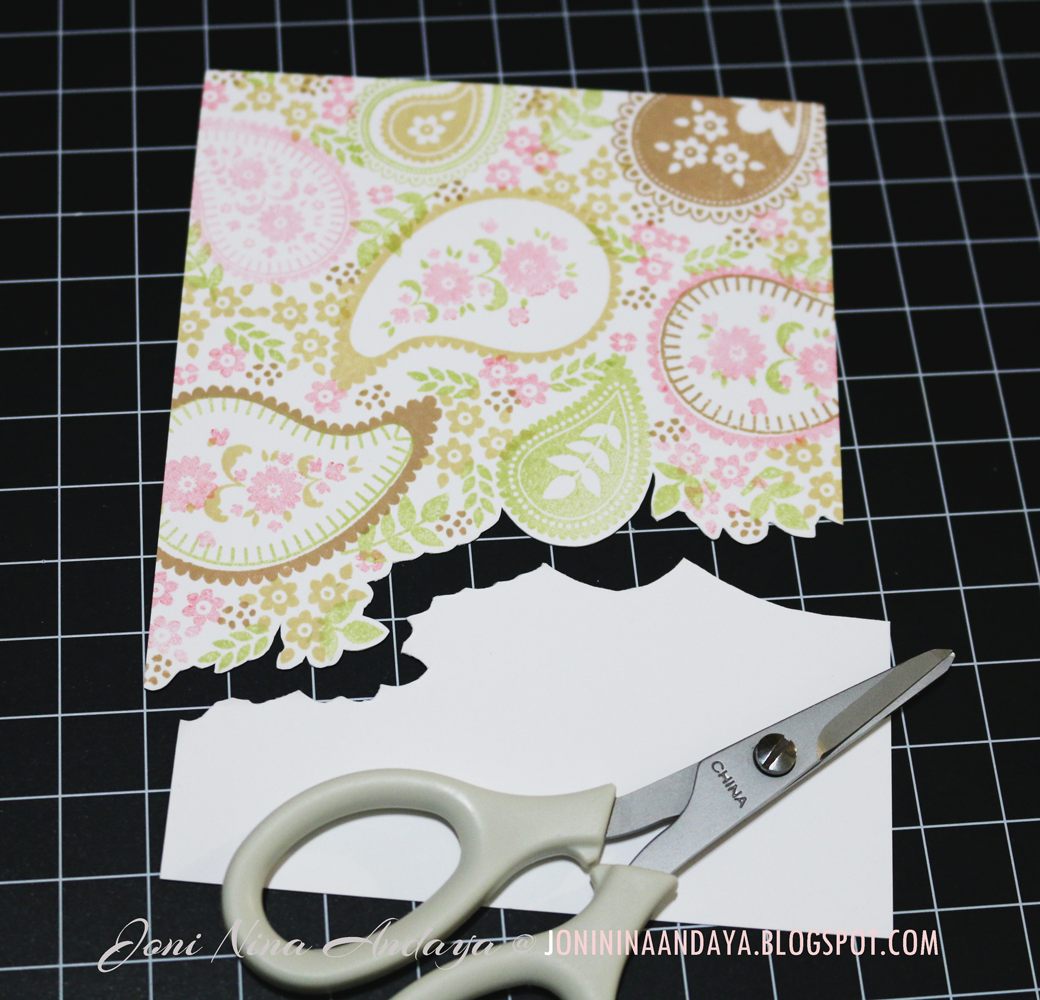
To begin: I first stamp my image on the panel, then cut the bottom where my image stopped.
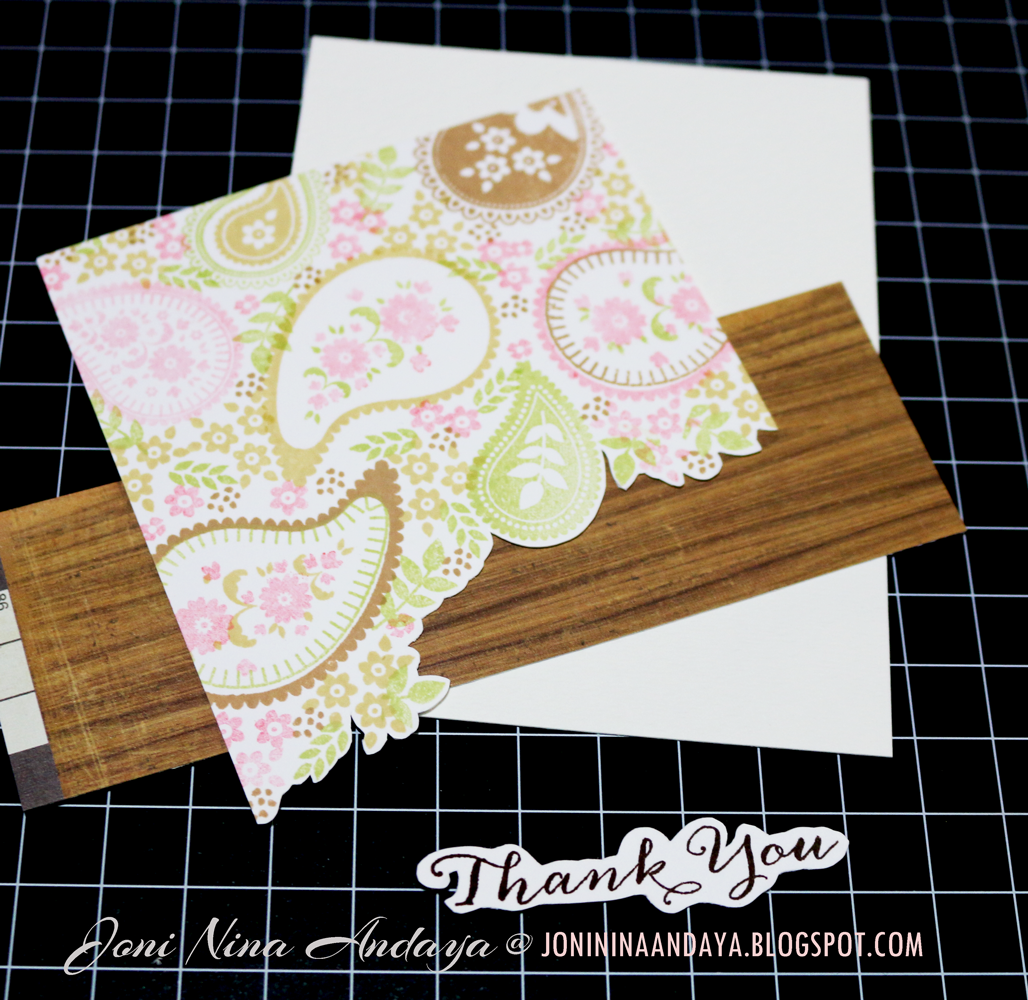
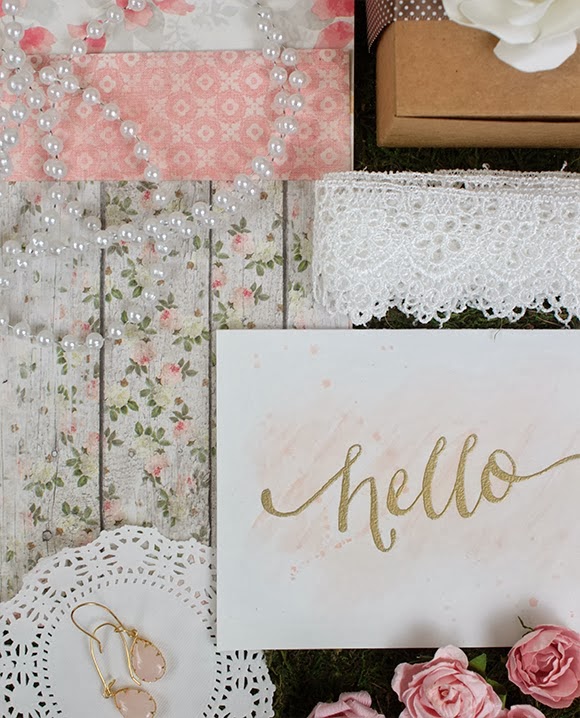
These are the elements I used not sequins not included in the photo:
For the wood panel I used...the wood pattern paper from Crate Paper, I attached it hanging a little on the edge of the stamped panel, then cut again.
After cutting my pieces, I then attached the Marshmallow sequins from Pretty Pink Posh in line at the top of my card, and some on the image it as well.
Wplus9 Monday Mood Board #26 too.
To begin: I first stamp my image on the panel, then cut the bottom where my image stopped.
These are the elements I used not sequins not included in the photo:
For the wood panel I used...the wood pattern paper from Crate Paper, I attached it hanging a little on the edge of the stamped panel, then cut again.

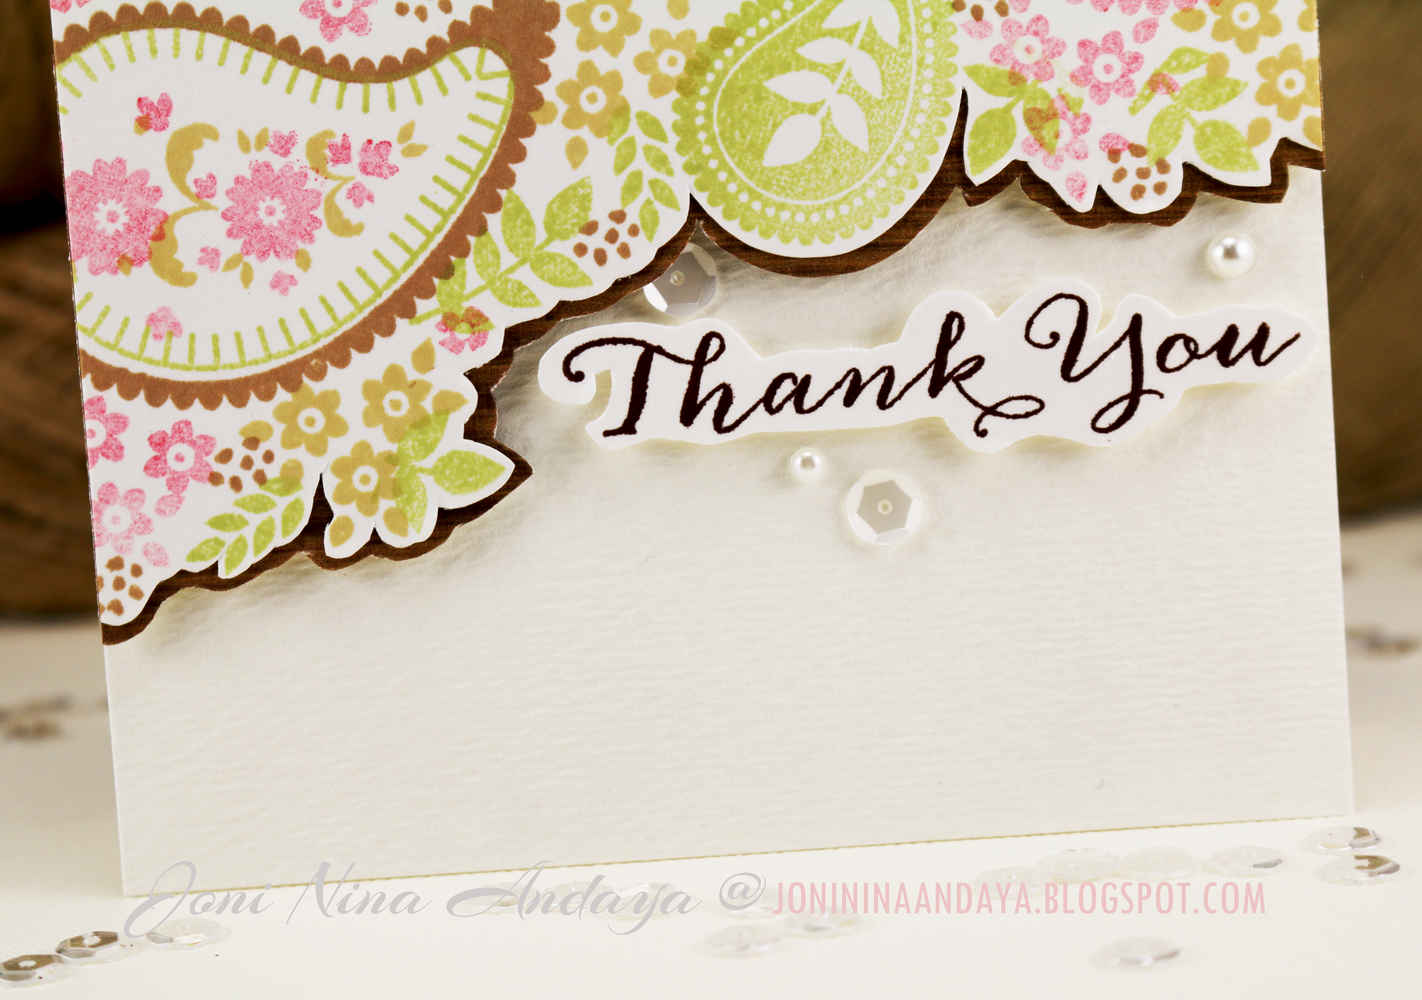
At the bottom of my card you can see the wood pattern paper cut to mimic the cut stamped image on the edge to add dimension on my stamped image.
The sentiment "Thank You" is from the Wplus9 Fanciful Feather stamp set.
Also added some Marshmallow sequins and pearl rhinestones at the bottom to finish the card.

Wplus9 Monday Mood Board
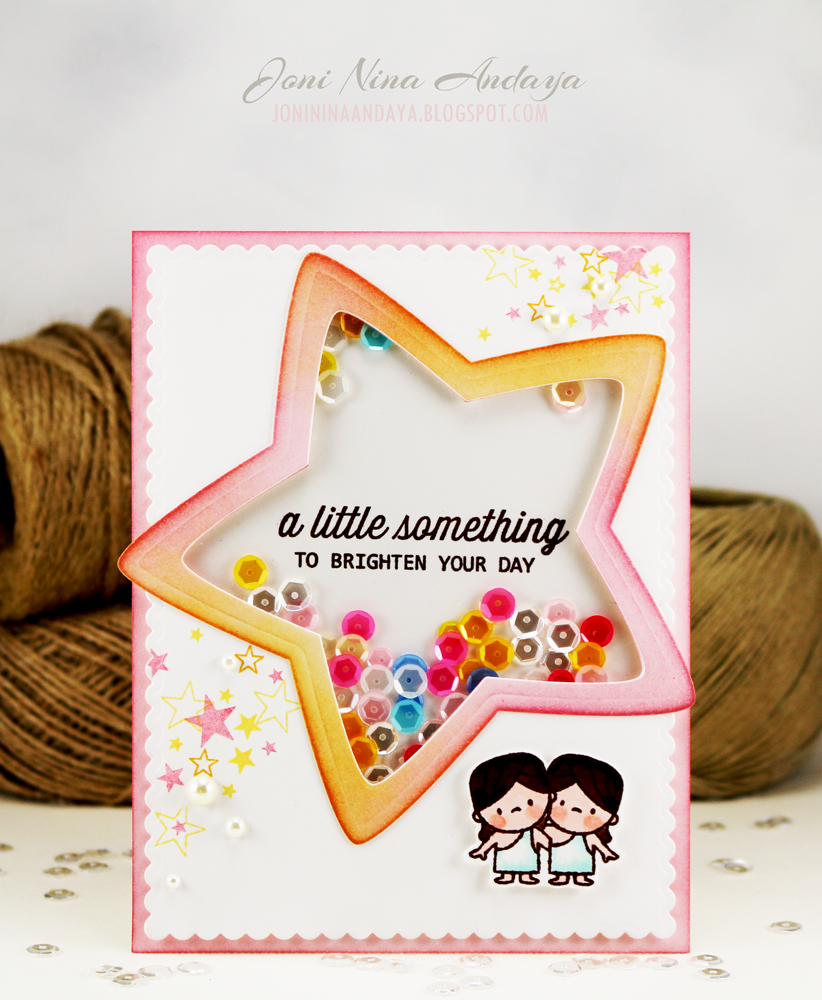
For my second card:
I first distress my card base with Distress ink using the Ranger Worn Lipstick. I then
cut another panel using the Mama Elephant Creative Cuts Femme Frames.
For the sentiment "a little something to brighten your day" I used the
Wplus9 Blanket Stitched Blooms stamp set.
I then cut my Lawn Fawn Puffy Star die to create my star window, where I added different color sequins from Pretty Pink Posh to create my shaker card.
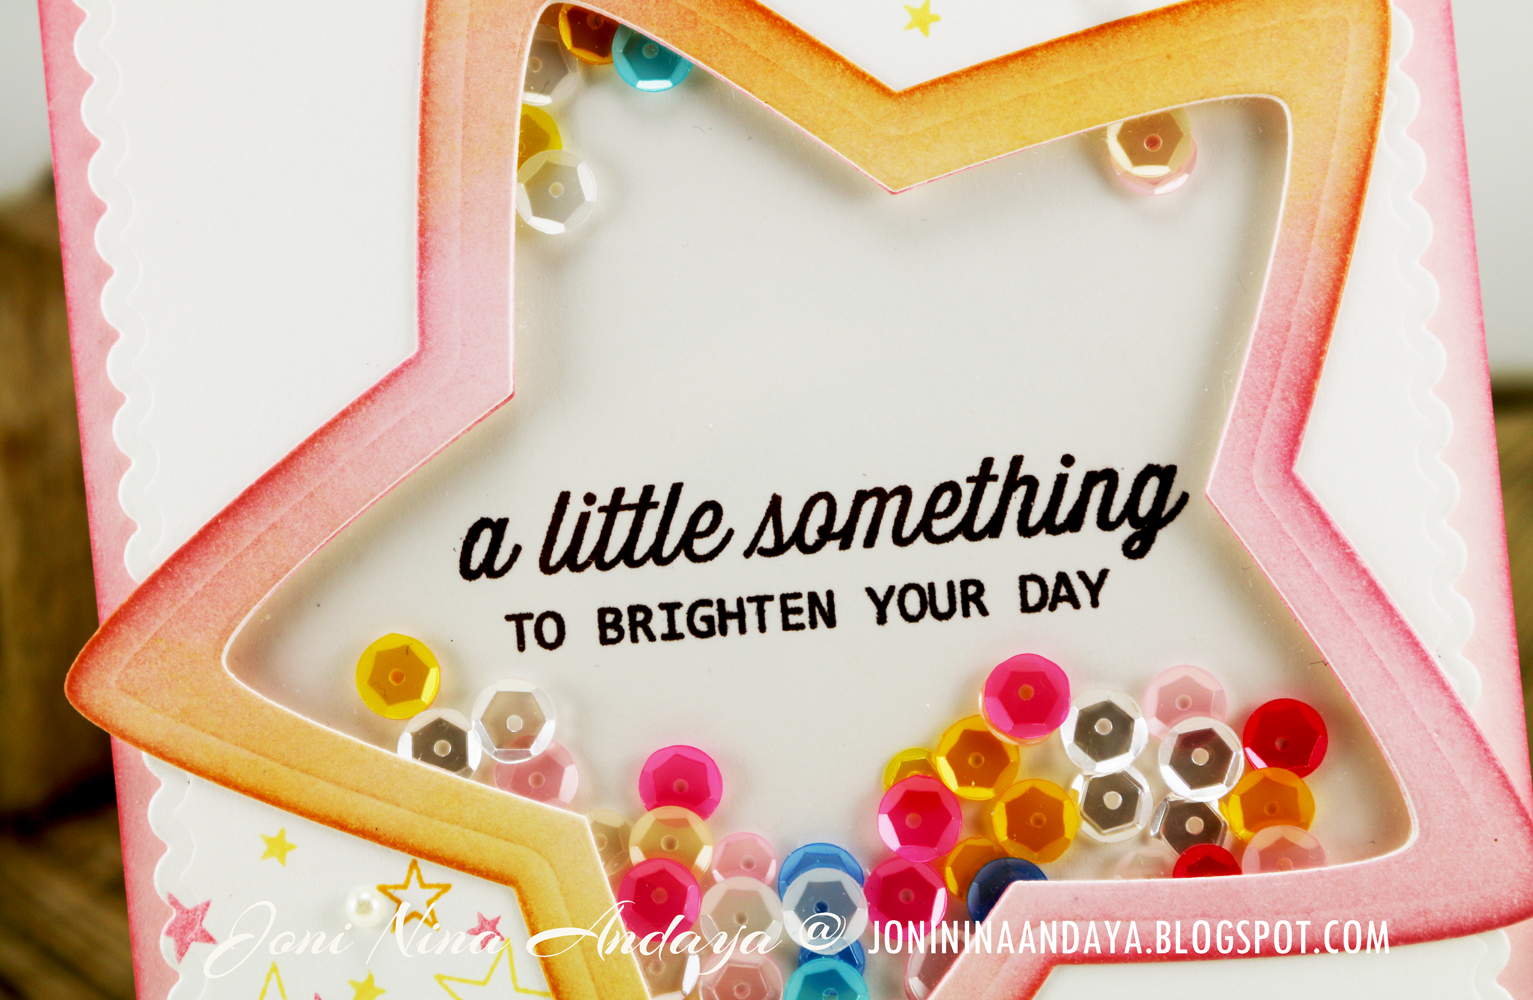
The cute image is from Mama Elephant Cosmic Stars. The random stars you see on top and on the side of my card is from the new line of stamp set by Winnie & Walter Scenery: Big Bang Confetti stamp set.
I added some pearls with my star image on the top and on the side to finish it off.

Here's the full view of my second card.
Thank you for joining and visiting me.
You can check out the NEW Pretty Pink Posh Store
HERE.
Have a Fabulous day :)