Thursday, April 30, 2015

Wplu9 - You Can Do It!

If you are looking for the Pretty Pink Posh Matching Game post please click HERE.
For Winnie & Walter Day 3 Release Preview please click HERE.
..............................................................................................................................................


Hello Everyone, I just want to share these cards I made for a friend of mine who is a teacher. She 
needed some cards to give to her students to give them some encouragement before taking the last exam of the semester.

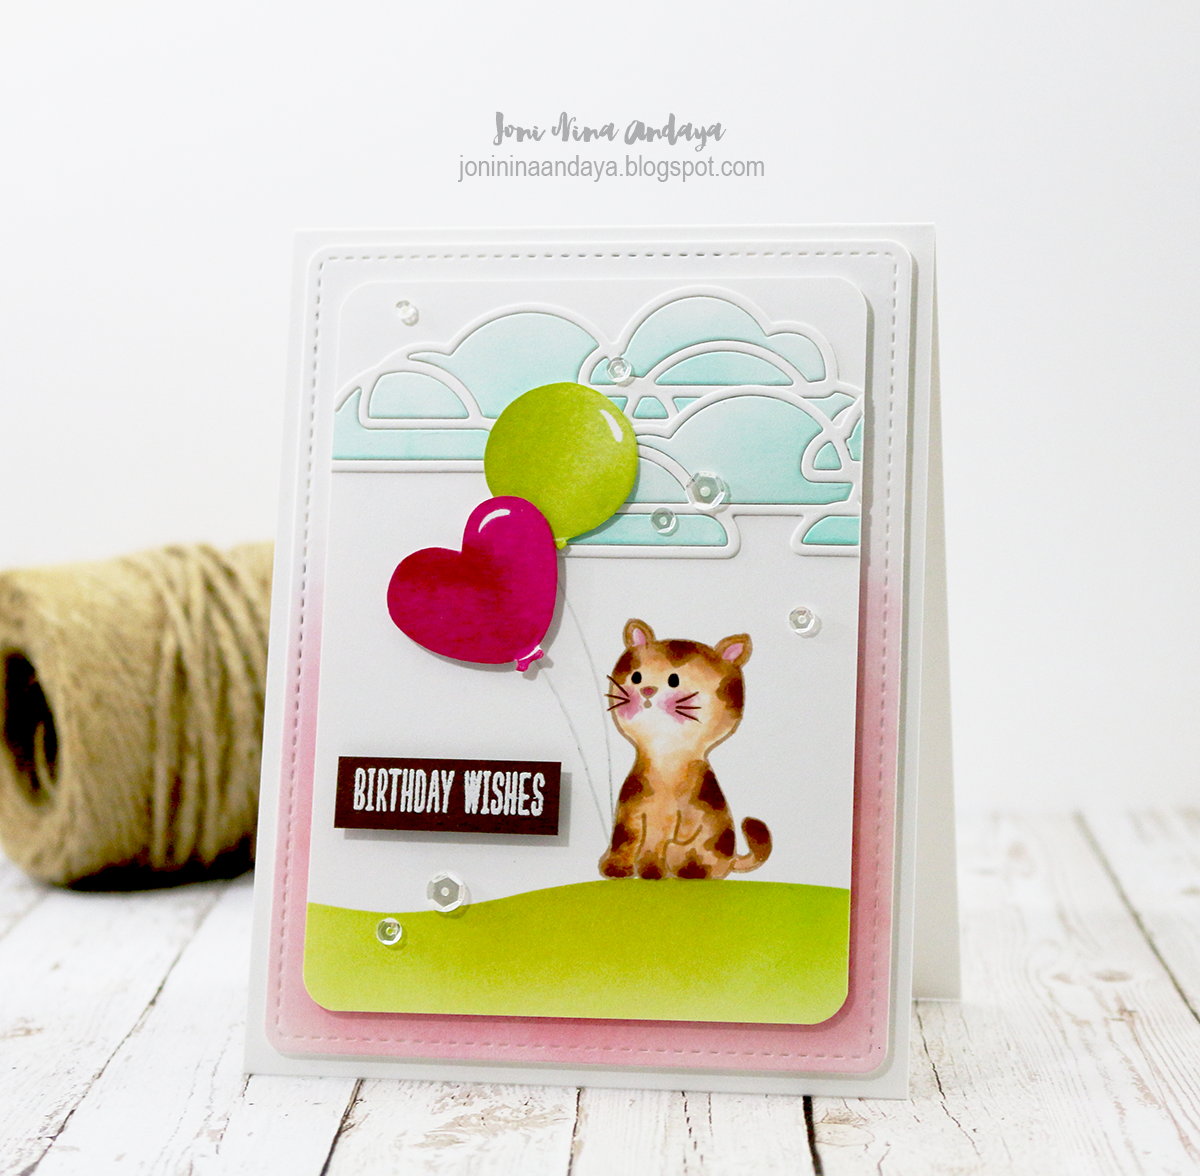
On this set I used the Smart Kitty stamp set, Encouraging Words stamp set, and Love Showers Layers die-cuts.


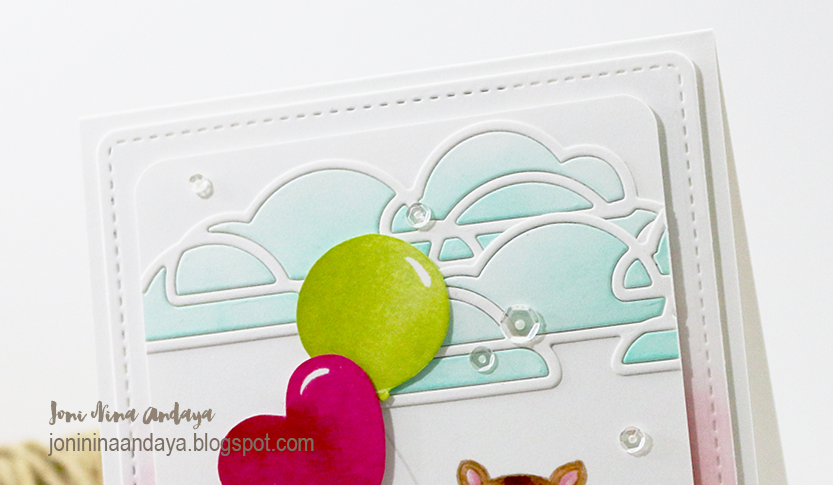
To begin I gathered the pieces for the card. I cut the Coal Mine cardstock same size as an A2 card. I stamped the white cardstock panel with the mountain images from the Encouraging Words and used the sentiments as well.

I also die-cut the frame on the kraft cardstock from the Love Showers Layers die and added some yellow ribbons.


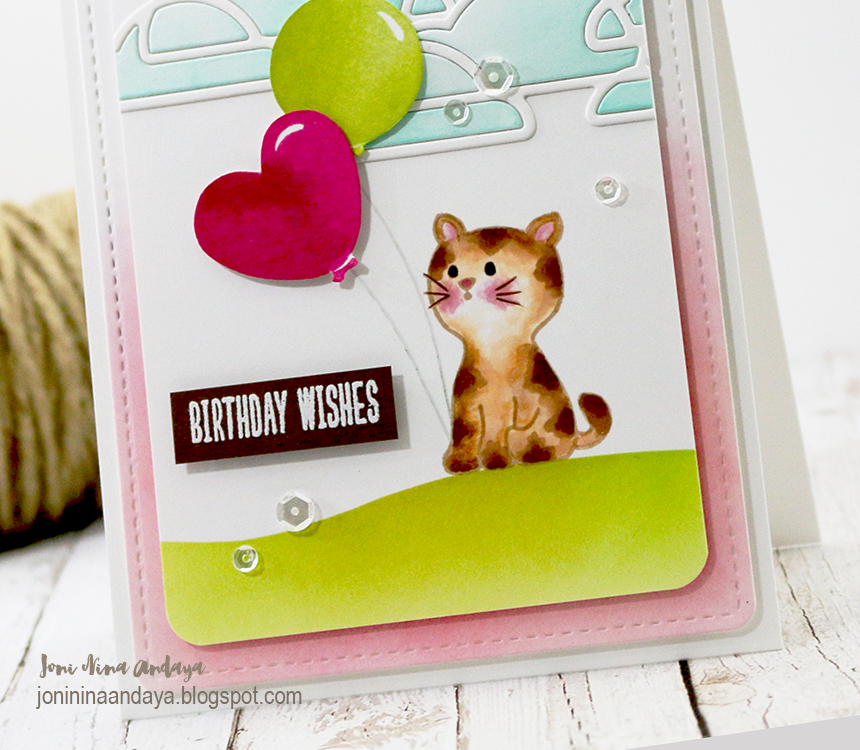
Here's how the assembly looks like. I added the kitty from Smart Kitty and added some sequins from Pretty Pink Posh in Lemon Drop, Sparkling Clear, and Lime Sorbet.


I hope you guys enjoyed.


Thank you so much for stopping by :)
Have a Wonderful Week!!!


Pretty Pink Posh - Matching Game with Giveaway.


Hello Everyone, Pretty Pink Posh is announcing three new addition to the Pretty Pink Posh family
 Yuki YoshiokaNicole Gavaldon and Yoonsun Hur
because of this Pretty Pink Posh is doing a fun game called Matching Game. Whoever guessed all the cards correctly will win a $50 gift certificate to use at the Pretty Pink Posh Store.
The winner will be posted on the
  Pretty Pink Posh Blog.


My Hint for my card.....hmmm my love for watercolor *wink*!


For more information please visit the
Pretty Pink Posh Blog

Good Luck and Happy Guessing :)


Have a Wonderful Week!


Winnie & Walter - Day 3 Release Preview


Hello Everyone, Welcome back with the Day 3 Winnie & Walter Release previews.
Its all about In Bloom: Addie’s Garden, In Bloom: Maggie’s Roses Cutaways
The Big, the Bold and Extras Cutaways.


For my card I used the pretty flowers from In Bloom: Addie’s Garden stamp set.


To begin, I first stamped the flowers on the card and watercolored each one but not some much blending here, just put the colors in and let it dry. Once the flowers dried then I watercolored the background with more watercolor and then let it dry.


Next, I stamped the sentiment from The Big, the Bold and Comfort stamp sets and I also used the "comfort" The Big, the Bold and Comfort Cutaways.


For this card I used the In Bloom: Lola's Bouquet stamp set and the Essentials: Katherine Cutaways using the line of tiny dots die added at the bottom of the card.


I also added some Tangerine sequins from Pretty Pink Posh to finish off the card flat and cupped.


Below, I used the line dots die-cut from the Essentials: Katherine Cutaways.


I hope you enjoyed!

Thank you so much for stopping by!
For more Inspiration please visit Winnie & Walter's Blog.


Wednesday, April 29, 2015

Winnie & Walter - Day 2 Release Preview & a GIVEAWAY!!!


Hello Everyone, Welcome back with Winnie & Walter's Day 2 Release Previews. Today Winnie & Walter are showcasing  -  In Bloom: Lola’s Bouquet stamp set, the flower set I Illustrated for Winnie & Walter. I am really excited about this set, there're just so many possibilities and its really easy to mix and match :) W&W is also showcasing the new In a Word Cutaways (four (4) dies) and the new Essentials: Audrey Cutaways.


I am also doing a Giveaway info below on this post :)


For my first project, I created a patterned background for my card using the new In Bloom: Lola's Bouquet stamp set. I also used the Cutaways "thanks" (I simply cut the 's' on the thanks) and "you" from The Big, the Bold and You for my sentiment on my card.


Here's the close up of the sentiments and flower background.


For my next, project I used the other open flower image on the set. This flower type is open, easily to color it with copics or watercolor. 


To begin, I cut a cream cardstock for my card base, I also cut another white cardstock panel where I distressed using Distress Inks in Spun Sugar but only half way of the panel, splatter from water on the panel just to give it a little variation on the background.

Next. I die-cut the top panel with the swirl die-cut from Goldie Trim Cutaways and adhered on the top of the top panel for a fun design :)

The sentiment is from the new upcoming The Big, the Bold and Friends stamp set. The "Hugs" sentiment was fussy cut and adhere with foam tape on the panel.


On this card I watercolored these flower and leaves, then fussy cut and adhered on the card panel. I also added some sequins from Pretty Pink Posh in Sparkling Clear and Tangerine to finish of the card.


For this last project I used some of the leaves from the In Bloom: Lola's Boutique to create a sunflower for my card. 


Below is the step by step on how I created this sunflower power.


Next, after creating my set images below, I then fussy cut the images again for assembling on my card. 


For the background of my card I added some dots using a white gel pen Uni-ball Signo Broad.

The sunflower, I adhered the one layer petals on top of the two layered petals for dimension on my card. I also added some diamond Stickles on the flower petals for shine.


The vase on my card is stamped with the stem and leaves then fussy cut again. The vase was colored with Copics and I added again some diamond Stickles. I hope you can see it in the photo below.

The sentiments I used is from the new upcoming The Big, the Bold, and Comfort stamp set. The "hope" was gold embossed on black cardstock and fussy card, then adhered with foam tape.

To finish of the card I then added some Sparkling Clear Pretty Pink Posh sequins.


I hope you guys enjoyed the possibilities of In Bloom: Lola's Bouquet stamp set.
For more inspiration please visit Winnie & Walter's blog.


GIVEAWAY ALERT!
I am giving away a stamp set of the In Bloom: Lola's Boutique.
Just leave me a comment until next Monday May 4 11:59 EST.
I will post the Winner on my blog, on my Facebook & Instagram the following day.


Thank you so much for stopping by!
Have a Gorgeous Day :)


Tuesday, April 28, 2015

Essentials by Ellen Spring 2015 Release Blog Hop

If you are looking for Winnie & Walter  - Day 1 release preview please click HERE.
..................................................................................................................................................


Hello Everyone, Welcome to the Essentials by Ellen Spring 2015 Release Blog Hop.
For my today's projects I am showcasing the Amazing Women stamp set and Wild Garden dies.
The fun begins in the CLASSroom and there is also a Grand Giveaway! To enter, be sure to leave a comment there, and at every stop along the hop by May 5th!  Winners will be announced May 8th.
...........................................................................................

To begin my first project I cut a panel smaller than my A2 card kraft card base then stamped the panel with sentiments from Amazing Women stamp set to have the background sentiment for the card. I also used the Bohemian Garden stamps and its coordinating dies for added touch.

 I also use the sequins from 
PPP Sparkling Clear Exclusive from Ellen Hutson store.


Here's the close-up of the sentiment background.


Next, I stamped some flower and leaves from the Bohemian Garden stamp set on a watercolor paper and watercolored the images using Distress Marker from Ranger. Then die-cut using Bohemian Garden coordinating dies and adhered the die-cut pieces with dimensional foam tape on the card panel. To finish off the card I added some Sparkling Clear Sequins from Pretty Pink Posh.


For my next project I used this gorgeous flowers and leaves dies from Wild Garden . This is really easy to do. I simply die-cut all the pieces then adhere them on a separate sticker sheet to avoid the die-cut pieces from separating (I only did this with some of the die-cut pieces) and colored each die-cut with Copic markers. I then fussy cut the die-cut piece and adhered it on my card panel. The sentiment I used was from the Mondo Magnolia stamp set.


Here's the closer look. For the card panel I also added some splatter of ink using a wet watercolor brush.


I hope you guys enjoyed!

For more inspiration and Giveaway...


On my Blog I get to Giveaway
Amazing Women


To win simply leave a comment here on my blog and I will pick one lucky commenter :)
 Winners will be announced May 8th.


Thank you so much for stopping by!
Have a wonderful week :)


Winnie & Walter - Day 1 Release Preview

Hello Everyone, Welcome to the Day 1 Winnie & Walter Release Previews.
Winnie & Walter is showcasing the new The Big, the Bold and Comfort, The Big, the Bold and Friends, The Big, the Bold and Comfort cutaways, and The Big, the Bold and Friends cutaways.

For today I am showcasing the The Big, the Bold and Friends, The Big, the Bold and Friends cutaways, In a Word: Hello cutaways, Essentials: Audrey cutawaysIn Bloom: Addie's Garden, and In Bloom Lola's Bouquet.

.........................................................................


To begin my card I first mask the top panel using post-it and then distress the panel using Ranger Distress Ink pads. After distressing I then stamped the sentiments from The Big, the Bold and Friends stamp set for having that font background I am going for.


Next, I die-cut the panel with the new In a Word: Hello cutaway to create a shaker. This large font die are so fun to use, really awesome to use for any type shaker projects you might have. Once the shaker was put together, I add the new pretty die-cut word "friend" from the The Big, the Bold and Friends cutaways using black cardstock for a pop of color. The sequins I used inside the shaker are from Pretty Pink Posh in Lime Sorbet, Aquamarine, and Lemon Drop in 4mm & 6mm. Outside the shaker also from PPP in Sparkling Clear in 4mm, 6mm, and 8mm.


For added touch I white embossed the leaves image from the new upcoming In Bloom: Addie's Garden and added a natural twine. I also added a butterfly die-cut from the new Essentials: Audrey cutaways to finish off the card.


just another look of the hello shaker :)


For my next project I created a birthday card using the new In Bloom: Lola's Bouquet stamp set that I Illustrated for Winnie & Walter. This set will be preview tomorrow, don't forget to come back here tomorrow to enter my Giveaway for the new In Bloom: Lola's Bouquet.

To begin my card I first mask the white cardstock panel with post-it and distress it with yellow ink, then added some white dots using the Uni-ball white pen in broad tip.

Next I stamped the vase and roses images from the set, then fussy cut. The vase was colored with Copic maker. I then adhered all the pieces together on the card panel. I also added some grey Copic coloring on the bottom panel, this helps ground the vase on the card to make it not to look that its floating on the panel. The sentiments were from the Winter Woodland stamp set.

I also added some Lemon Drop and Sparkling Clear sequins from PPP to finish off the card.


I hope you guys enjoyed!
For more inspiration please visit Winnie & Walter.
Winnie & Walter is also hosting a Giveaway on there blog :)


Thank you so much for visiting!
Have a Wonderful Week :)


Wednesday, April 15, 2015

Wplus9 - Smart Kitty Birthday Wishes & Giveaway Winner!!!


Hello Everyone, I am back with another Smart Kitty inspiration.
In this project I combined the New April 2015 Released Smart Kitty with the new  Cloud Border die along with the past released Basic Banners, and Whole Lotta' Happy stamp sets.


To begin I die-cut a white panel using the new Love Mom Layers die set for added stitching look and distress the bottom using the Distress ink in Spun Sugar to tie in the pink from the balloon. Then I used another white cardstock panel where I created my scene.

For the clouds I die-cut the clouds on a white cardstock and distressed it using the Wplus9 PURE Color dye ink in Bo Peep. Then I die-cut another white cardstock for outline of clouds using the dies.
I adhered the white outline first on the top panel and puzzled out the pieces of the clouds inside the white outline to get the distressed look I am going for.

For the balloons, I stamped the balloons on a white cardstock and fussy cut.


Next, I distressed the bottom of the top panel by masking then stamped the kitty and Copic colored it. Next, I stamped the balloon strings from Whole Lotta' Happy on the paw of the kitty as if it is holding the strings and adhered the balloons with foam dimensional tape.

Finally I added some sparkling clear sequins from Pretty Pink Posh to finish off the look.


I hope you guys enjoyed!


Also the WINNER of the Smart Kitty Collection goes to....


Congratulations Kay!!!
Please email me back with your addy and I will ship the Smart Kitty to you :)


Thank you so much for everyone's sweet comments, giving your two cents and ideas on what you would like to see in the future,
 You guys are the best!!!
Don't worry there will be more Giveaways to come.


Thank you so much much for stopping by.
xoxo


Monday, April 13, 2015

Wplus9 - Smart Kitty Treats


Hello Everyone, I just want to share the muslin treat bags I created to give out for friends using the new April 2015 Smart Kitty stamp set along with the past released Heartfelt Holiday, and Valentine Wishes stamp set.


Smart Kitty


To begin, I stamped the kitty image from Smart Kitty stamp set using the Versafine ink in Smoke Gray. I also colored the kitty using my Prismacolor pencils and Farber Castell color pencil to give the kitty some colors and avoid colors from bleeding on the muslin bags.


Before stamping and coloring on the on the muslin, I added a piece of cardstock inside like the one you see below. This helps keep the muslin from shifting or moving during the stamping and coloring.


For the image below I stamped the image with Versafine ink in Smoke Gray , colored it with color pencils in for the body of the kitty I used Prismacolor in Beige and Peach Beige. For the spots on the kitty I used Prismacolor Light Umber and for the cheeks/ears I used Farber Castell in Medium Flesh.

Next, I added the wreath image from the Valentine Wishes stamp set using Versafine ink ink Spanish Moss using second generation stamping to avoid smearing on the muslin bagsand for the sentiment "from our home to yours" I used the Heartfelt Holiday stamp set.


For the image below I stamped it with Versafine ink Smoke Gray . For this kitty I just colored the cheeks and ears to give it color using color pencil from Farber Castell in Medium Flesh.  

Next, I added the separate ferns with flowers images from Valentine Wishes stamp set and inked it with Versafine Spanish Moss using second generation stamping to avoid smearing on the muslin bags and for the sentiment "from our home to yours" I used the Heartfelt Holiday stamp set.

To complete the look I added some fuchsia ribbons from Michaels and the muslin bags were done.


I hope you guys enjoyed!


Thank you so much for stopping by.
xoxo.